This has been discussed on a couple of threads already, but I thought I'd share some pics of my wee solution, as I've been really impressed with how well it's worked. So, here's Womble's journey into the world of chicken thawing, in words and pictures!:
1) Cider VinegarAfter some others had mentioned this, I ran a controlled experiment. I took two baked bean cans, filled one with plain water, and the other with 10% cider vinegar in water. When put outside, the vinegar can took about an hour longer to go solid, but go solid it certainly did, and remained so in our front porch for the whole of Christmas week.
During an unseasonably warm snap

a few days ago, it did melt (whereas the pure water can didn't). Essentially the addition of vinegar did lower the melting point a little, and might work as mild frost protection. However, I'm kinda doubtful that the birds would have drunk it anyway, as the vinegar made it really stink!! So, let's try another tack.....
2) Womble's Water Heater MK1This was basically just a tall shortbread tin, with legs attached for stability, and loads of holes drilled to give air flow.
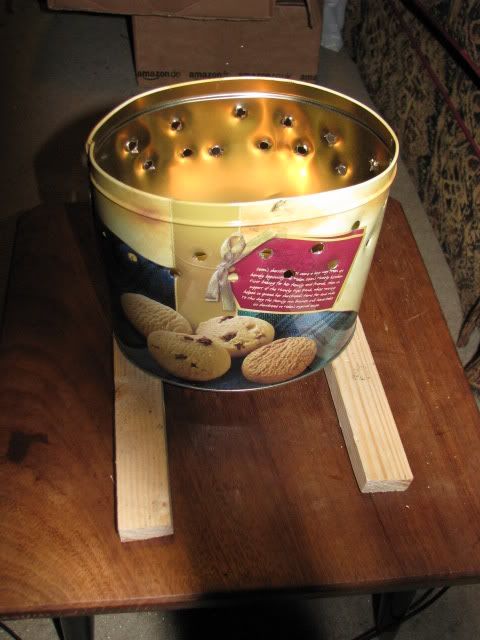
Stick a tealight inside, put the lid on, and place a bowl of water on top - Simple!
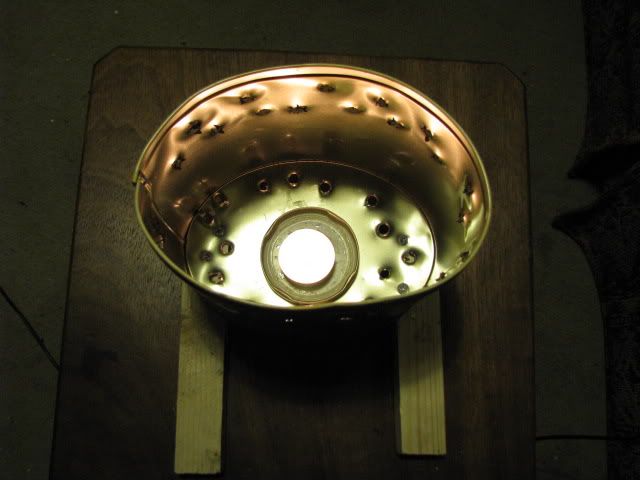
The problem with this design was that the tealight did not burn for a full day, the water was prone to becoming too hot (don't want scalded hens), and if really cold, the candle didn't melt properly. This meant it 'cored' quite quickly, burned up all the wick, and then went out within a couple of hours.
Hmmm, back to the drawing board!!
3) Womble's Improved Water Heater"Making good use of the things that we find, Things that the everyday folks leave behind.....
I was just about to bite the bullet and buy a 50m extension lead so I could run a light bulb to the coop when I saw Harry's great idea
on the other thread of using a paraffin greenhouse heater. The only problem is that if you don't have one already, they'll set you back about £20! However, I did have an old cheap hurricane lamp lying around (
this sort of thing - available for about £5) that has a paraffin wick and burner, so I decided to turn the workings from that into a wee anti-frost heater:
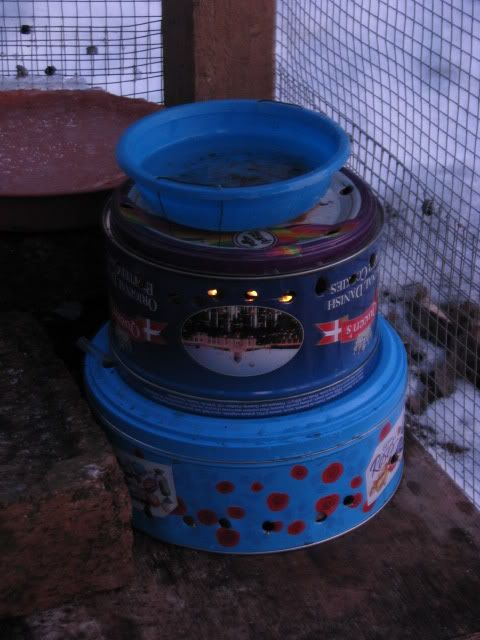
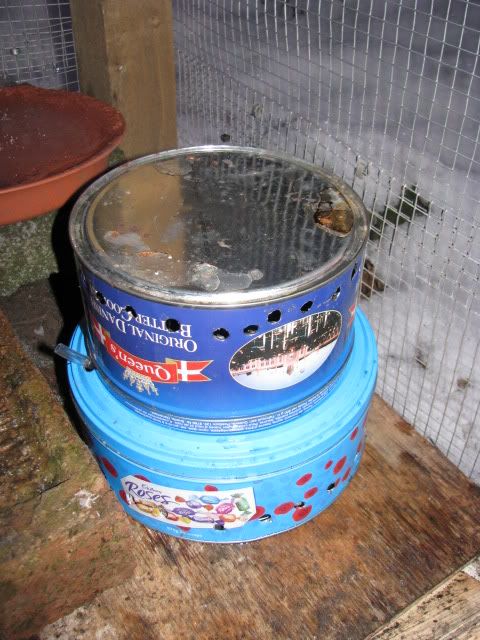
Step 1 was to take a large sweetie tin, and drill a load of air inlet holes right around the base. A wee plastic tub was then placed inside this tin, and filled with paraffin.
The next step was to mount the burner from the hurricane lamp through a hole cut in the lid of this large tin. The piece of plastic tubing is attached to the wick adjuster knob on the burner, and is led outside through a hole in the lid. This enables the height of the flame to be finely adjusted whilst it's burning (very important!)
On the other side of the lid, I mounted the lid from another, slightly smaller tin upside down, and also wired a tuna tin in place, upside down over the head of the burner. I used garden wire to join everything together - not pretty, but it works!
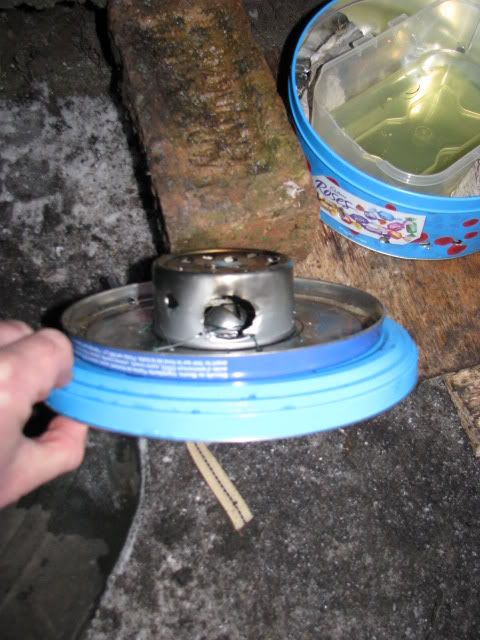
The tuna tin serves to protect the flame from wind, but has loads of holes in it for ventilation, and a larger hole for putting a match through for lighting.

This type of burner sucks air from underneath, and exhausts on top. The assembly can now be put together, and the flame lit
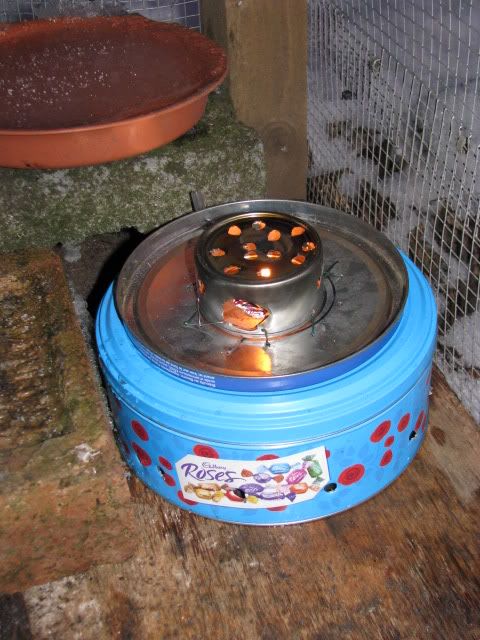
The next step is to drill a load of holes around the perimeter of the smaller tin as air outlet holes. This is then placed upside-down over the flame, to form a base to rest the water on top of.
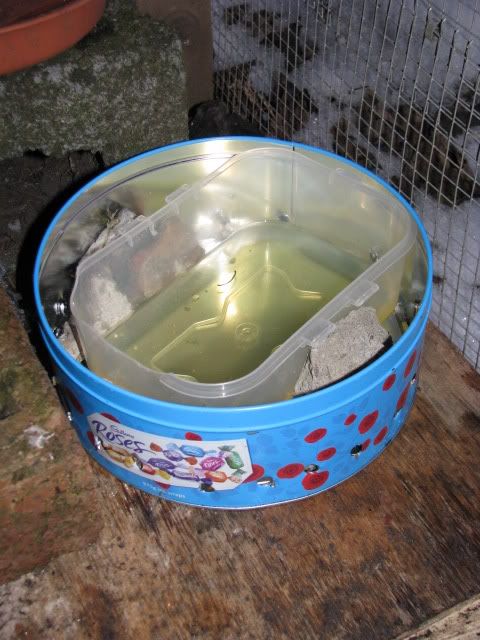
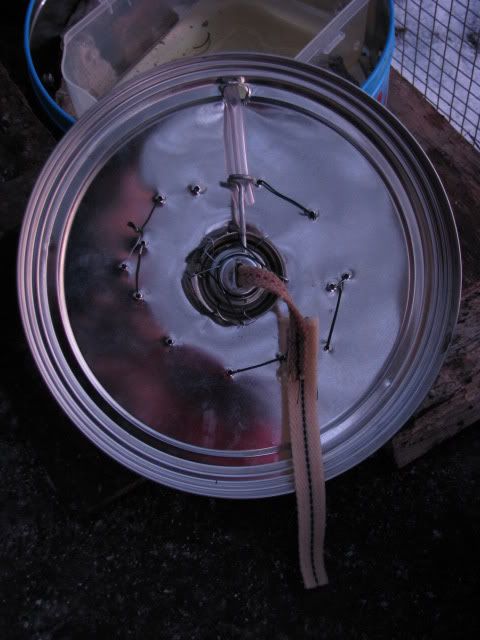
The final piece of the jigsaw is the lid from yet another tin, which has holes drilled right round it, and a water bowl wired to the top of it. This is then placed on top of the other tin, so that there is an air gap between the two sheets of metal:
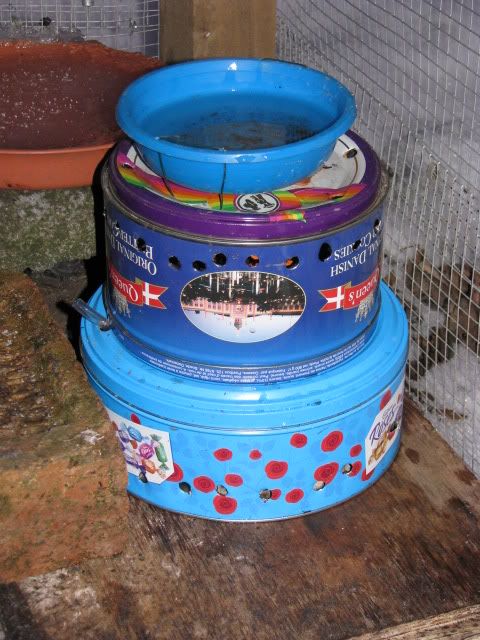
Tidy up all the holes, to make sure there are no sharp bits sticking out, and there you have it!
I found that the height of the flame is absolutely critical - too small or too large, and it goes out. The right height seems to be the size of a small candle flame, so that the flame is entirely contained within the tuna tin.
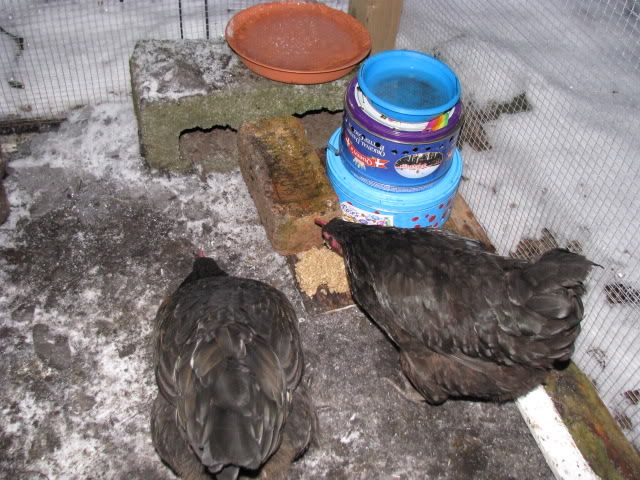
I also added a thin piece of wood between the tin lid and the bowl, as the water was getting too hot. With this final bit of fine tuning everything has turned out very nicely indeed. With the flame adjusted to the right height, the tins remain cool to touch, whilst the water also stays cool but un-frozen (it was fine the other night with temperatures at -10degC, but also not too hot today at -1degC). The flame also seems to stay lit ok in a wind, which is another important factor. Obviously this burner should only be used outside in the open air, but with the plastic tub full of paraffin or central heating oil, it will burn for about five days.
So, all in all, I'm well chuffed! Problem solved for zero cost, and happy hens again!
Of course, there are loads of different ways to solve this problem, but I've been so impressed with how this solution has worked, that I thought I'd share it with the forum - Hope this is helpful to others!
Womble (by name and nature
).
 Topic: Womble's Home-made chicken water heater (Read 4308 times)