Well, four years on, we
finally got around to doing this!! No, not stripping all the plasterboard off, that's far too much upheaval. However, I think we've done a decent enough job - let me know what you think!
Here's what we started with (view from the loft looking down at the slopy bit):
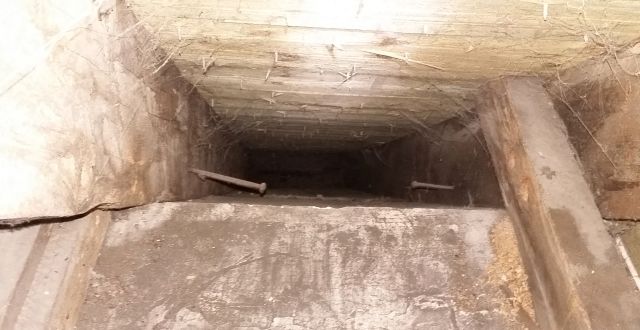
We couldn't use anything solid like Kinspan without taking down the plasterboard, since the horizontal ceiling joists (is that the right word?) were in the way, not to mention plenty of nails etc sticking through. So..... we bought rolls of "
Supaloft" recycled polyester insulation, from
www.roofingsuperstore.co.uk. This was mainly because it was the right width already without cutting, but also because it's nice non-itchy stuff (important since we were going to be getting up close and personal with it!).
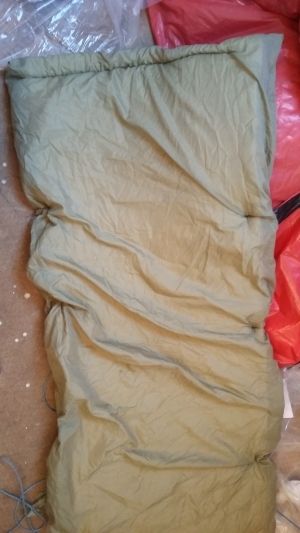
The trouble with the supaloft is that it tears really easily, so there was no way we'd have been able to get it down the gap between the roof timbers on its own..... so, I stitched up a 'sleeping bag' out of some old parachute fabric I had left over from another job:
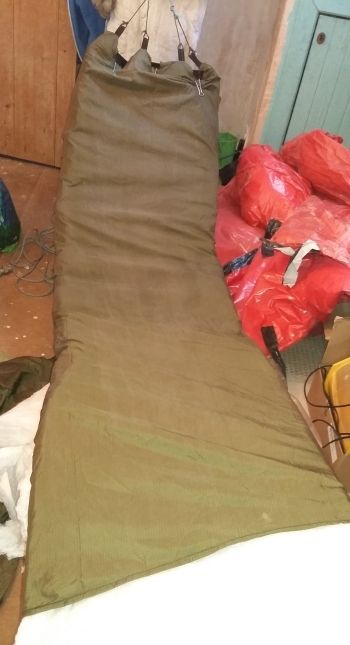
We then slid the insulation inside the 'sleeping bag' and held there using large Bulldog clips.
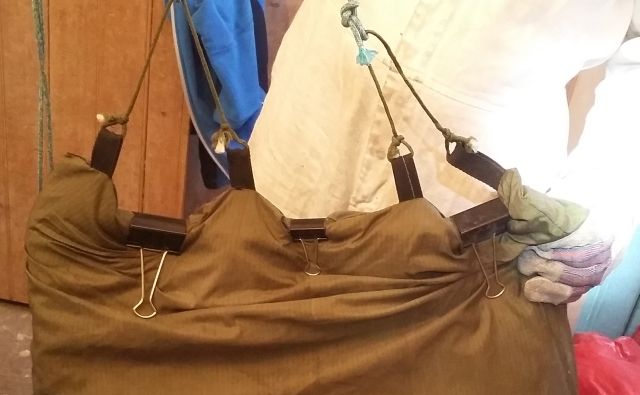
We were lucky that we had access to both the top and the bottom of the slopy bit in most cases. We got the insulation into position by going up into the loft and dropping a loop of string down on a weight, where it was caught by my willing assistant in the cupboard below (at floor level). He then pulled the whole thing down into the gap, with me guiding and persuading from the top. Then, once it was where we wanted it, he released the bulldog clips and pulled the slippy 'sleeping bag' clear, whilst I held the insulation in place from the top.
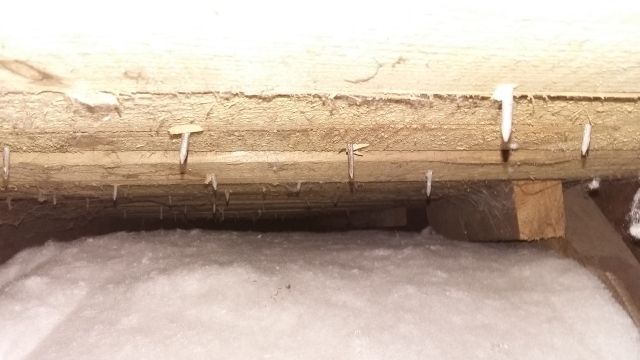
Here it is with two 50mm thick layers of insulation in place:
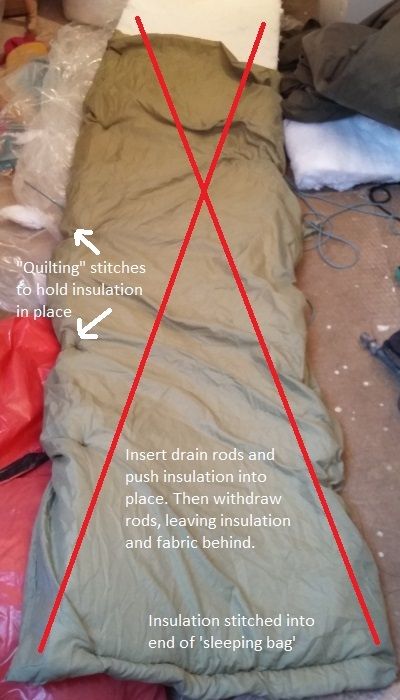
There were also four sections which we could only access from the top, so here I used some old fabric (again, stuff I had lying about), and stitched it permanently around the insulation to make a sort of duvet.
We then pushed it into place using drain rods:
So, all in all we're pretty chuffed. It took a bit of time to do, but we managed to insulate the coombed bit pretty well, and also left an air gap under the sarking for ventilation. What's more, we didn't have to go through all the upheaval of taking down the plasterboard

.
The upstairs of the house is now far warmer than it was before. It's also warmer upstairs now than downstairs, which used not to be the case. Anyway, I thought I'd leave these photos out there in internet land just in case the methods we used are useful to somebody else someday
.
 Topic: Insulating Behind Slopy Ceilings (Read 14992 times)

