When we moved here, we inherited a couple of rickety old wooden troughs, which I repaired to remove the sticking out nails etc etc

. These are the
traditional v-type design, but I've found them to be heavy, slimey, difficult to turn over and generally unpleasant to use!
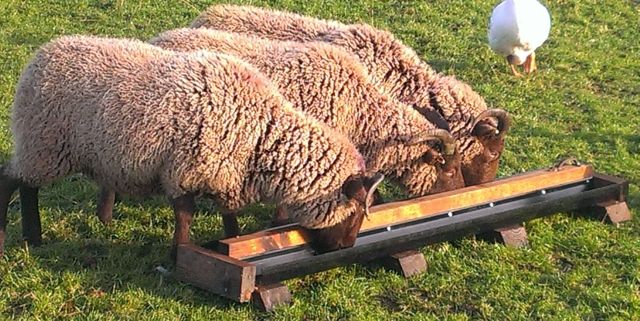
So, enter Womble's improved design!

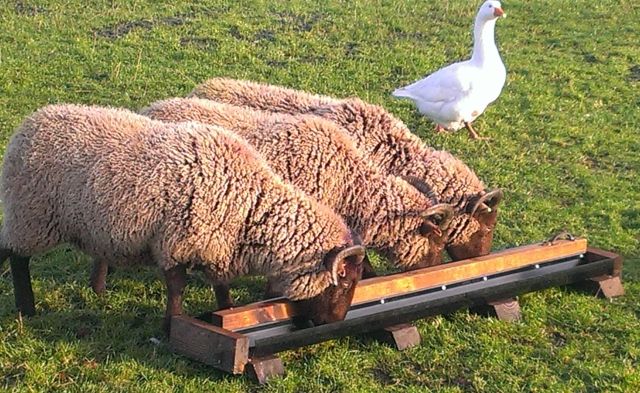
I've made a couple of these now, and they're working really well. They're lightweight, self-draining, have no sharp edges to hurt the sheep, and they can also get right to the bottom of the trough to eat all the food, unlike with the 90 degree vee design. The other bonus is that they only cost £10-£15 each in materials, and can be made in about an hour if you have powertools available

.
Their weakness is that they aren't robust enough for anything larger than sheep, but since that's all we have, it's not a problem!
To make one, you will need:
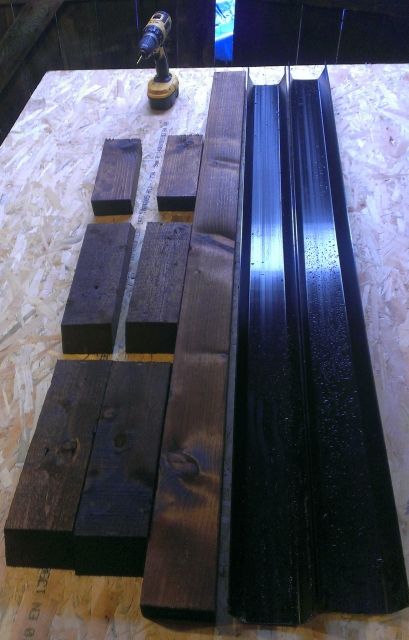
- A 3m length of squareline guttering (£6.99 from Screwfix)
- 2" x 4" softwood, approx 4 metres in total (mine was wombled from a skip at work).
- 3" woodscrews
- 1" screws for attaching the gutter. I used 'flanged' screws, which worked really well and left no sharp edges to hurt the sheep
Assembly Instructions:
- Start by cutting the guttering in half - an angle grinder works really well (or use two lengths to make a 3m long trough I suppose!)
- Cut a length of timber 2cm longer than the pieces of gutter.
- Cut four 37 cm ish lengths of wood for the feet. I cut these off at an angle because it was really easy to do with my circular saw, but if you only have a jigsaw or hand saw, just cut them off straight
- Cut two 27.5 cm pieces of wood for the ends. These are sized so they will cover two widths of gutter plus the middle piece of wood.
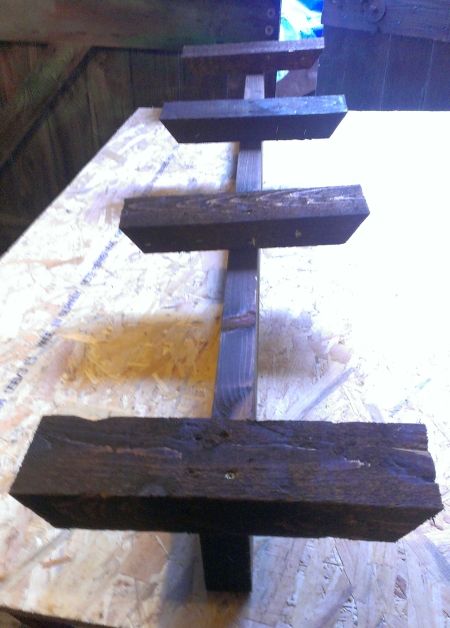
- You should now have something resembling this:
6. If you want to paint any preservative onto the wood, now would be the time!
7. Screw the feet onto the long support plank. Note that the end feet should be flush with the ends of the support.
8. Turn the whole thing over and screw the wooden ends on. Note, the top of these should be level with the top of the gutter.
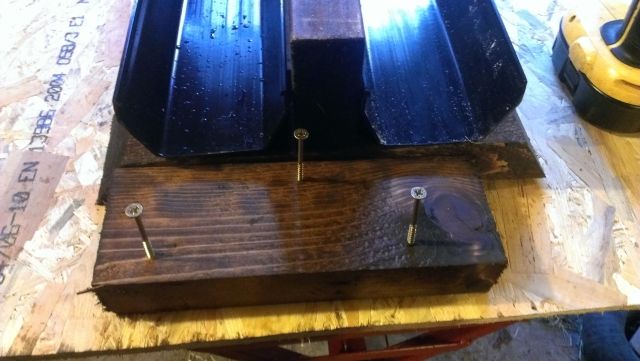
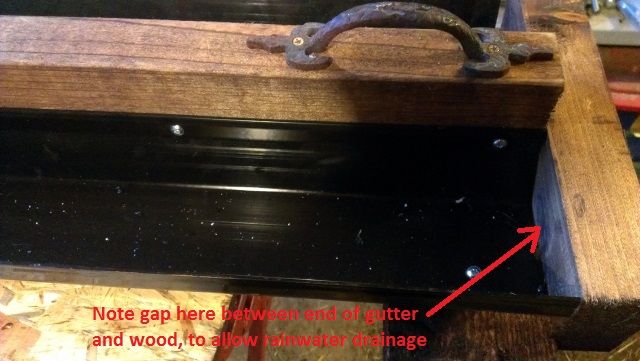
9. Now drill pilot holes along one edge of each of your lengths of gutter, just undereath the rim, then screw them into place onto both horizontally into the long plank, and vertically downwards into the feet. There should be a gap of about 1cm at each end of the gutter (which doesn't show well in the photos), to let rainwater drain out.
10. Add a handle if you happen to have a spare one or two lying around

.
And that's it! - easy eh? In actual fact, it's taken me as long to write this post as it did to make the trough!
If you decide to make one, do let me know how you get on!
.
 Topic: A ridiculously easy sheep trough design (Read 15278 times)